
Today we have the super talented Melanie Matthews giving us a step-by-step look into her illustration process. Melanie is a freelance illustrator and designer based in Melbourne, Australia. Her work is really great, and I'm so happy to have her share her process for everyone on Ten Paces!
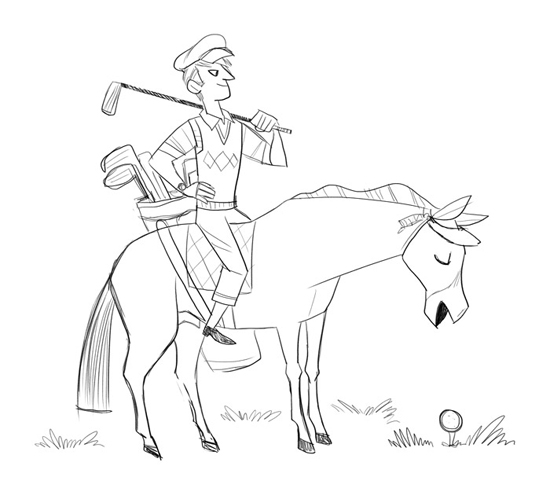
1. Here is my cleaned up sketch, opened in Photoshop and ready to go!
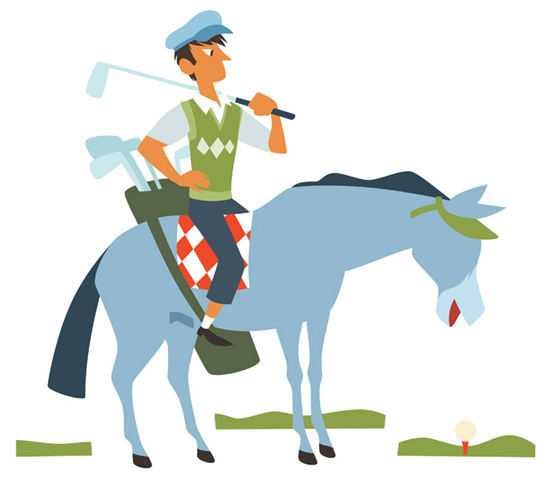
2. The very first step of colouring is to fill in all of the flat colours. This can be done in either Photoshop or Illustrator, but I tend to do this in Photoshop. These colours can also be changed during the next step but this is pretty much what the final colours will be.
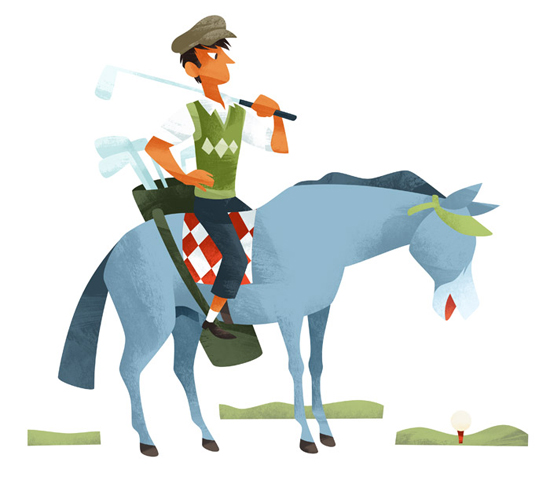
3. After the colours are all down, next comes the most fun part – adding textures! I use my own Photoshop brushes, which are made by making paint splotches on paper with black acrylic paint, and then scanning them and converting them into Photoshop brushes. Putting the textures in is a matter of ‘painting’ them in and blending them until I get the look that I want.
Each layer is textured one by one, as you can see here.

4. The next step after all the textures are done, is to go back in with a pencil brush and add some line work and draw in the last few details.

These details include things like facial features, outlines and maybe a bit of cross-hatching for extra shading.
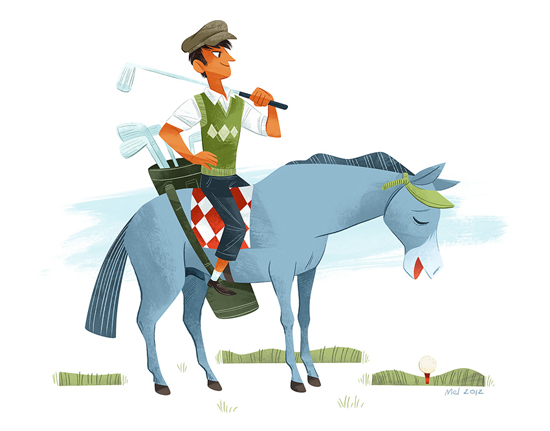
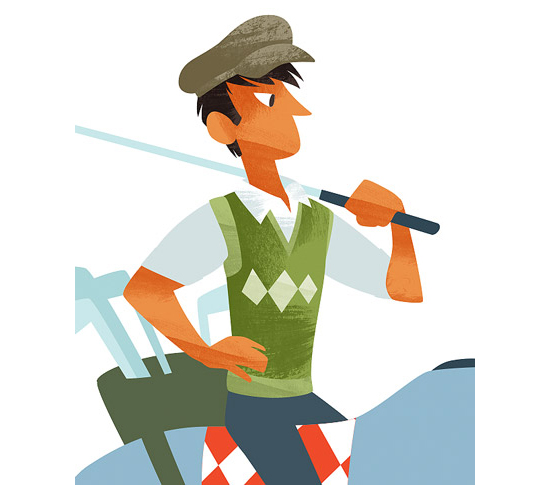
5. And below is the finished piece, with all the lines added in! Hooray! Now it’s time to enjoy a cup of tea and some biscuits!
To check out more of Melanie's work you can visit her portfolio, twitter, and flickr!
Haha, I love her last line the most. This is great, love the white streaks in the horse's hair and stray away sideburn on the dude.
ReplyDeleteLove it !! Thanks again for those process posts, they are so great and makes me learn a lot !! :)
ReplyDelete